Up to 50% OFF
This week we dive into how-to's. Monday, we looked at adding Instagram videos from your custom Slide clip creations. After that, we looked at creating Google Slide presentations (think of PowerPoint for Google basically). And today we look at the snip and sketch tool and will learn how to copy your screen on Windows 10. This is really helpful for capturing images when writing an SOP, work instruction, single point lesson, or are reporting bugs and errors to software teams. They say a picture is worth 1,000 words, so let's jump right in with our first screen snip:
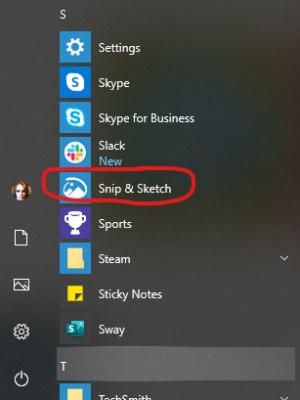
This tool resides in your applications library on Windows 10 as seen in the image below.
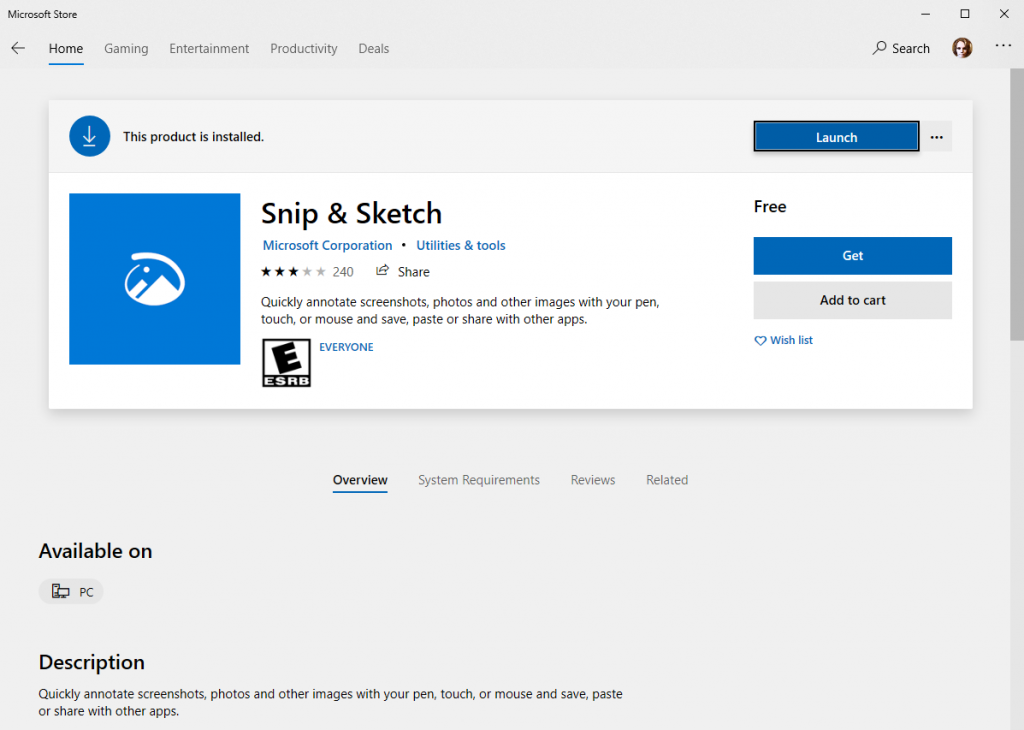
You can download this tool free from Microsoft's website here: https://www.microsoft.com/en-us/p/snip-sketch/9mz95kl8mr0l?activetab=pivot:overviewtab or you can download it from the Microsoft Store on your computer.
In order to copy your screen in Windows, you first need to set up the tool, following the steps outlined below:
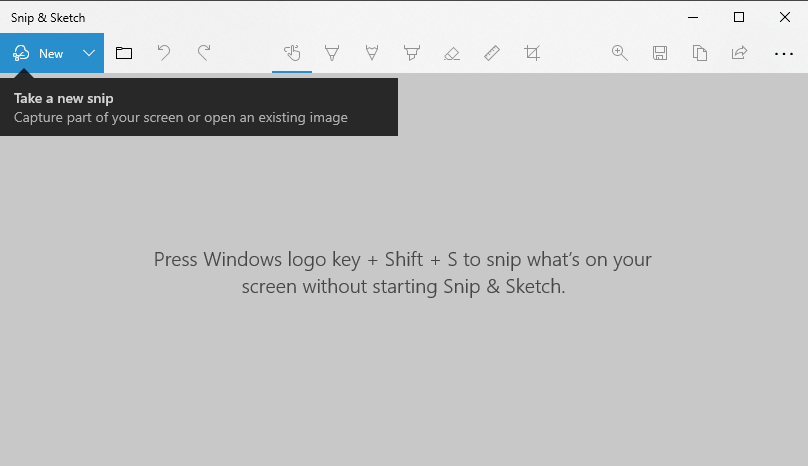
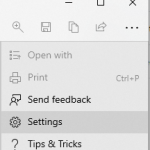
2. Click on the 3 horizontal dots in the upper right corner, and select "Settings".
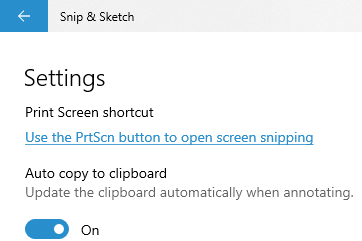
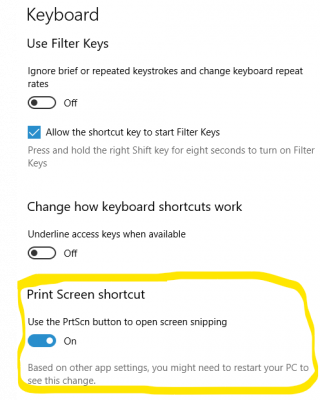
Click on "Use the PrtScn button to open screen snipping"
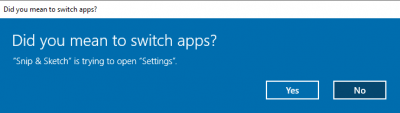
Accept the prompt to switch apps when it appears
Scroll down the Keyboard menu that appears until you reach the option to enable Print screen
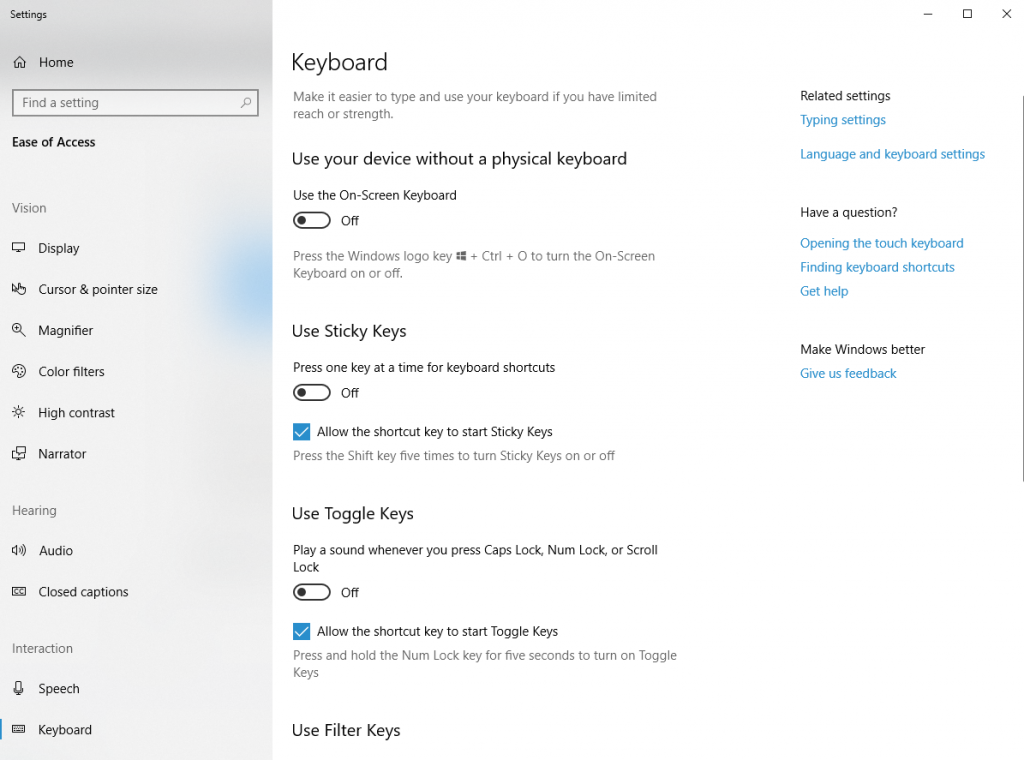
Click on the blue toggle to enable the Print Screen shortcut, and you are ready to go.

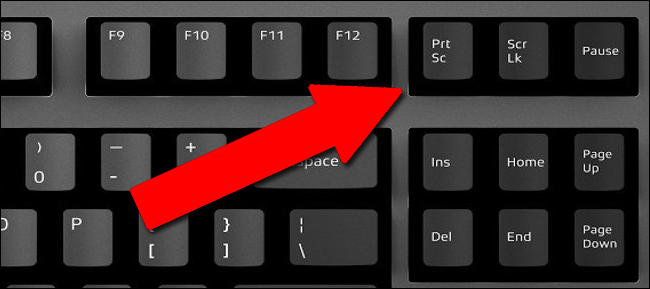
Step 1: while viewing whatever screen you want to capture, press the print screen button on your keyboard.
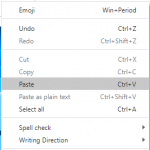
Step 2: Open whatever program you wish to have the image pasted into (Word, Google Docs, Paint, PhotoShop, Facebook, Twitter, Trello, Wordpress...the list goes on)
Step 3: press Ctrl+V on your keyboard or right-click and select Paste
Congratulations! You have shared your first screen-captured image using Snip & Sketch! Being able to copy your screen on Windows 10 enables you to quickly post images of problems, steps to be taken, and more. The list goes on! Once you've begun using Snip&Sketch to copy your screen on Windows 10, feel free to comment below on what you like most about it, and how you are using it in your daily life.


© 2009-2025 Eclipse Digital Imaging, Inc.
Quality PowerPoint Templates, Animations, videos, and 3D Clipart.
PowerPoint® is a registered trademark
of Microsoft Corporation.