Up to 50% OFF

Let's start by opening the program Windows Live Movie Maker (later known as "Movie Maker"), created by Microsoft. Don't have it? You can download it for free from Microsoft .
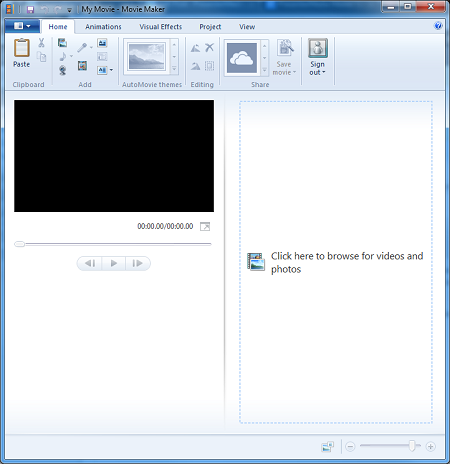 Open Windows Live Movie Maker (AKA Movie Maker)
Once you have Movie Maker open, it's time to add the "time". Start by adding a Title at 1 Second. How to do this you ask? Click the Title button, then delete the area that appears by clicking the purple area labeled "My Title" and pressing Delete.
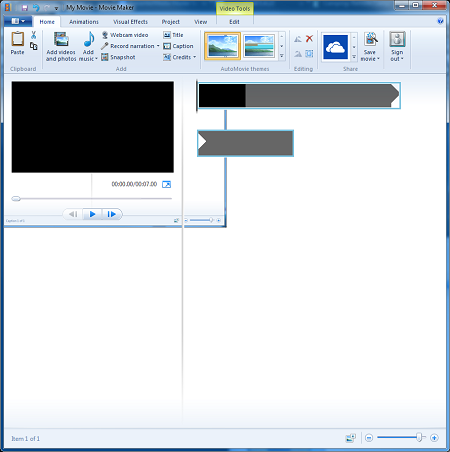
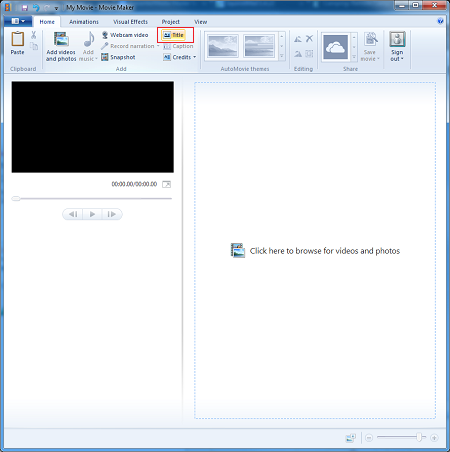 Click "Title" to insert an available media space
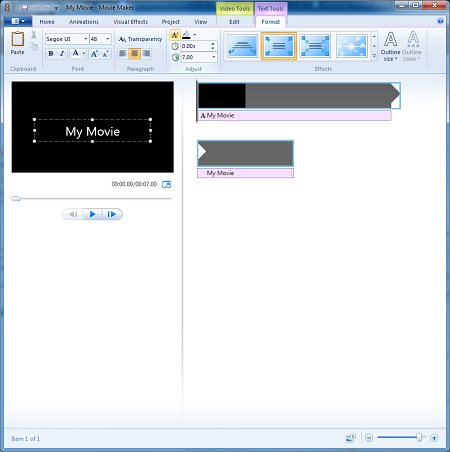 After clicking "Title" you will see the default "My Movie" title, and a black bar (with a purple bar below it indicating how long the title will be seen)
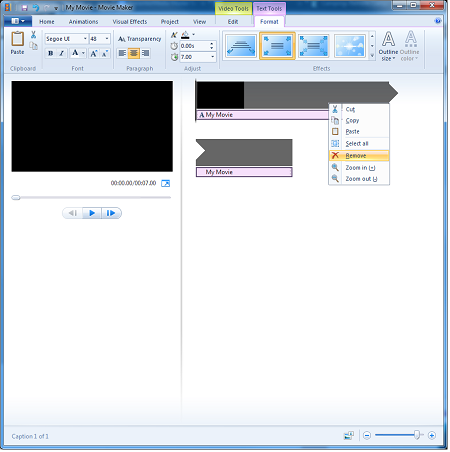 Right click on the purple ribbon and select "Remove"
 After clicking "Remove", you will be left only with the black ribbon (this is where we will be adding our countdown)
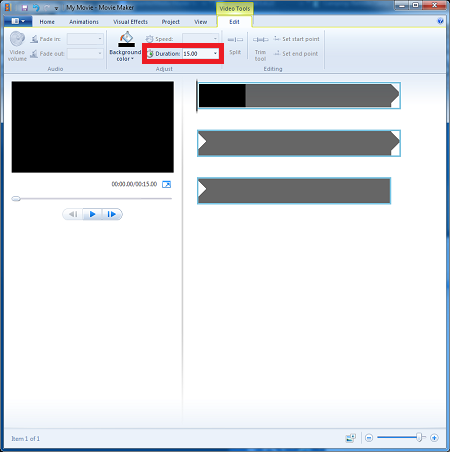
Once the "My Movie" title has been removed, it's time to select the length of time you wish the counter to work for (whether it is 10, 20, 30 seconds of 5 minutes. Keep in mind, the longer it is, the longer it will take to create). To change the length of the total project, go to Video Tools>Edit and change the Duration from the default 7.00 to whatever length (in seconds) you'd like. For our example, we will be using 15 seconds. Add 1 second to the length of the duration that you want (if you want a 15 second timer, make the duration 16 seconds).
 Extend the length to whatever length you'd like the counter to count until.
Next, it's time to add the "Captions", or the second "tickers". This is done by adding Captions, then giving them a 1 second delay time, setting each to start exactly as the prior caption finishes. Essentially, here are the steps you'll be performing:
1) Click the Caption button
2) Click the "Text" Edit button
3) Set the delay to 1.0 Sec and the duration to 1.0 Sec.
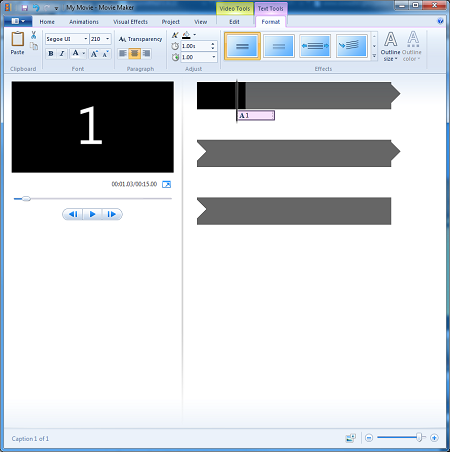 Click Caption, 1 second delay, 1 second duration
4) Copy the caption (purple line) and paste, then edit the Text Tools>Format to be 2.00 Seconds delay and 1.00 Second duration
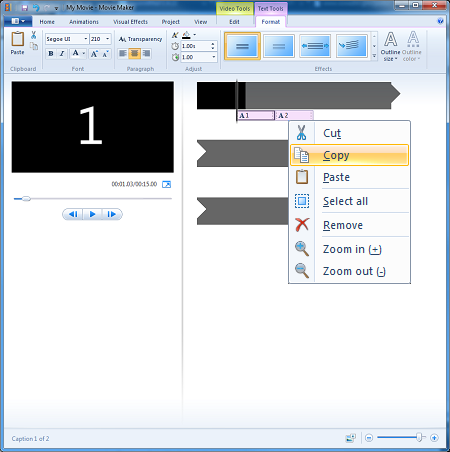 Right click and "Copy" the caption area, then paste and repeat the timing and duration (remember to add 1 second of delay for each new time)
Repeat this process (yes it can be a lot) until you have the full length of the timer created. (note this can be counting UP, or counting DOWN).
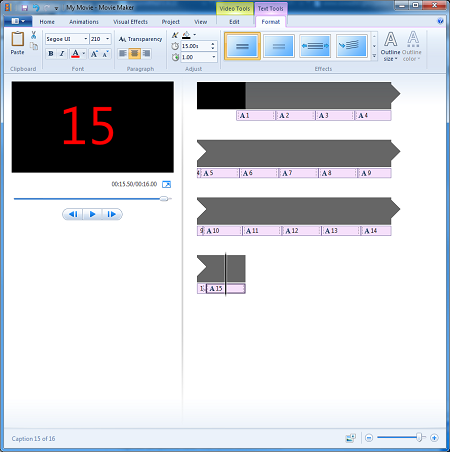 Repeat the previous steps until you reach the final length of your timer, remember to add 1 second past your last "tick".
Now, it's time to save the timer. If the timer is only going to be placed into a PowerPoint slide or something equally small (say you want it just in the bottom corner, nothing very large), you can get away saving this out as a VERY low resolution video. Obviously if you're wanting this to end up on some 60" scoreboard screen, you'd be wanting a higher resolution video.
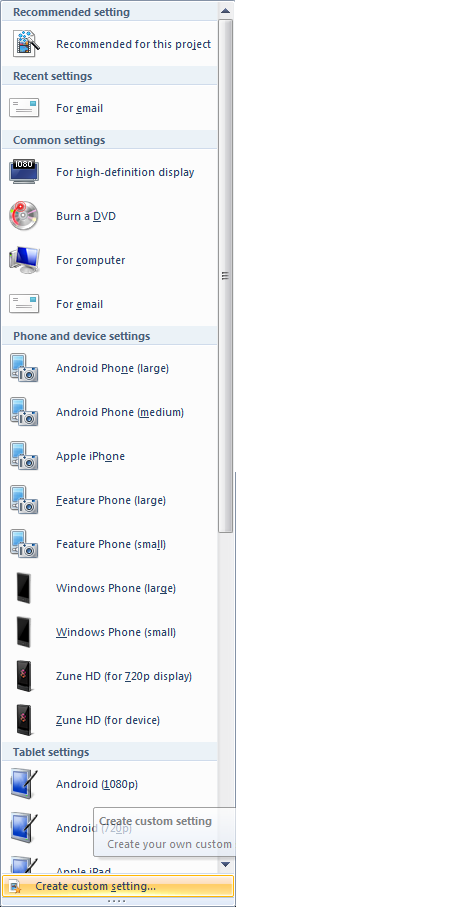 Create custom setting
Create a custom size, or choose "For Computer" which will default to 640 x 480, for an example, our 15 second video (really 16 seconds long) ended up being 745 KB in size at the 640 x 480 dimensions. The same shrunk down to 400 x 300 is now 378 KB, and one more smaller will get us the same file size (250 x 187). If you're curious how they all end up looking, we'll take a look at all three of these added to the same slide.
 640 x 480
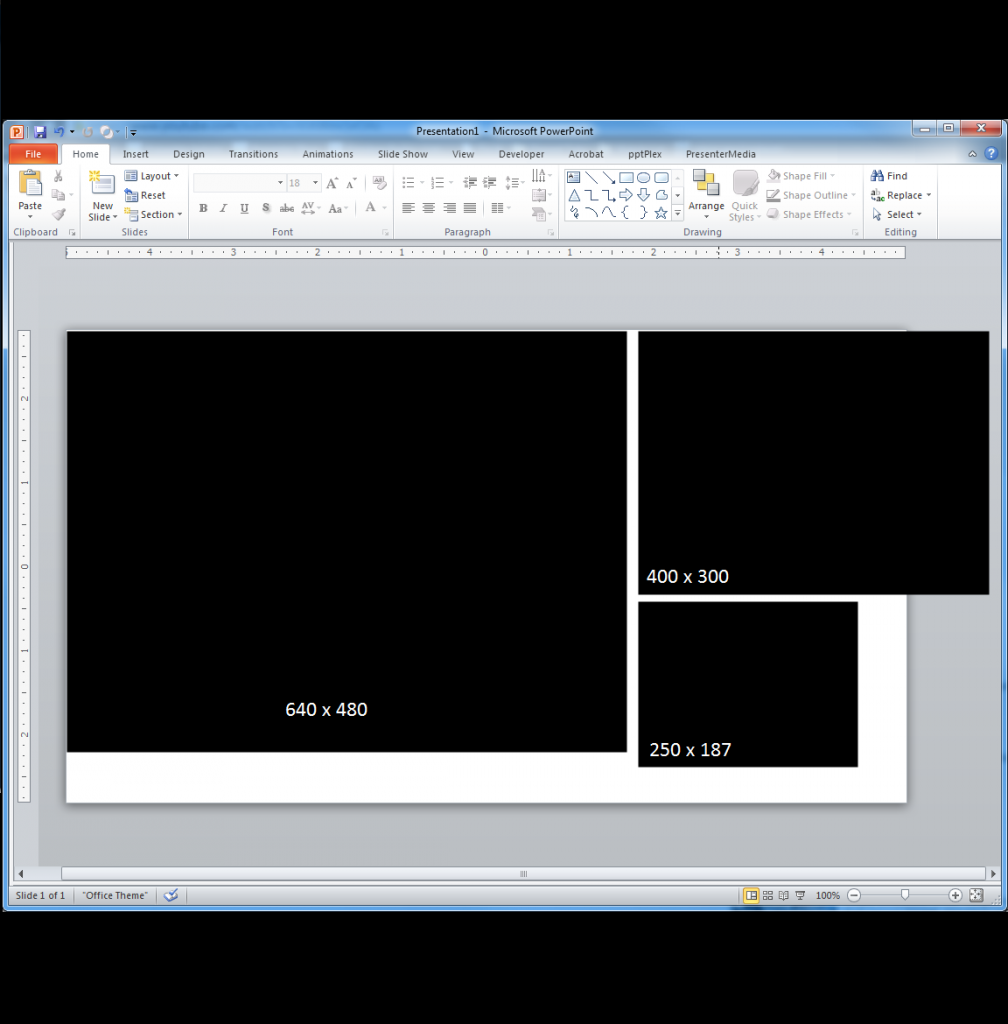 Differences between the sizes of video. Remember, the 250 x 187 is the same file size as the 400 x 300, which is half that of the 640.
Once your video timer is placed into your presentation, the next step is to set it to play Across _ Slides, meaning it will continue to play through the slideshow, regardless of what slide you're on. To get to this point, click on the video, then go to "Video Tools">"Playback">"Automatically". Next go to your Animations tab and ultimately, your animation pane.
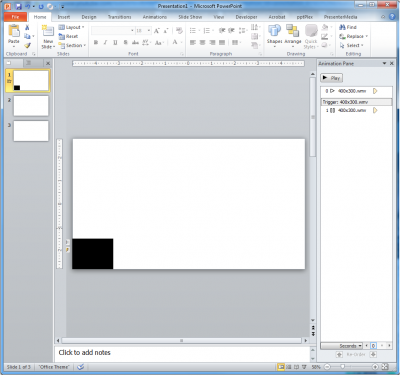 Animations Pane with the video in place. go to Effect Options and set to Stop After 3 Slides (in our case)
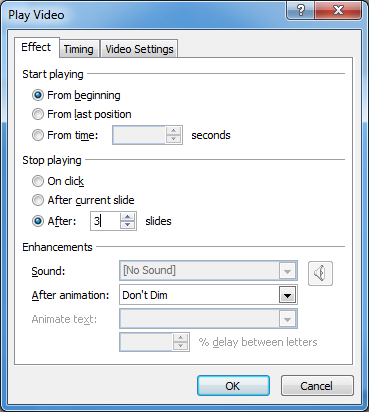
Click "OK" and it's time to play the show!
Curious how ours turned out? Check it out here: SlideShow Example


© 2009-2025 Eclipse Digital Imaging, Inc.
Quality PowerPoint Templates, Animations, videos, and 3D Clipart.
PowerPoint® is a registered trademark
of Microsoft Corporation.