
How to Add Your Company Logo to Every Slide in PowerPoint
Updated on October 28, 2025
If you're creating presentations for your business, consistency is key to professional branding. One of the most overlooked but powerful ways to keep your brand front and center is to add your company logo to every PowerPoint slide automatically. Whether you're pitching clients, training employees, or sharing quarterly results, having a branded slide deck strengthens recognition and credibility across your organization.
This step-by-step guide will show you how to add a logo to all slides in PowerPoint using the Slide Master tool—a simple feature that ensures your logo appears in the same spot across your entire presentation. This process works for both new and existing PowerPoint files, so you can easily update your slides without tedious copy-and-paste work.
Why Add a Logo to All Slides?
A well-placed logo on each slide communicates professionalism, brand identity, and trust. It keeps your audience visually connected to your company throughout the presentation. Many businesses spend hours designing slides but forget that a consistent logo placement can make the difference between an average and a polished, cohesive deck.
Instead of inserting your logo on each slide manually, using the Slide Master allows PowerPoint to do the heavy lifting for you. It ensures perfect alignment, consistent sizing, and no accidental omissions—saving time and maintaining quality.
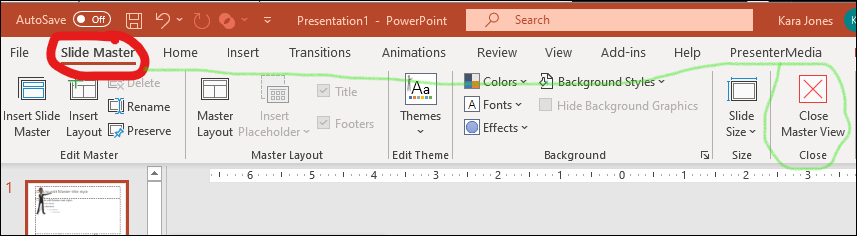
Step 1: Open the Slide Master
Begin by opening your PowerPoint presentation. Go to the top menu and click View > Slide Master. This opens the central layout that controls the design of every slide type in your presentation.
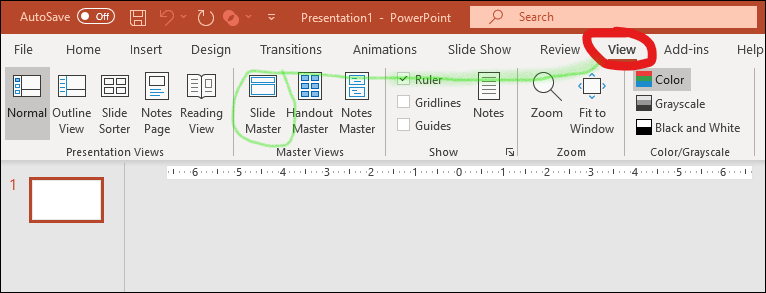
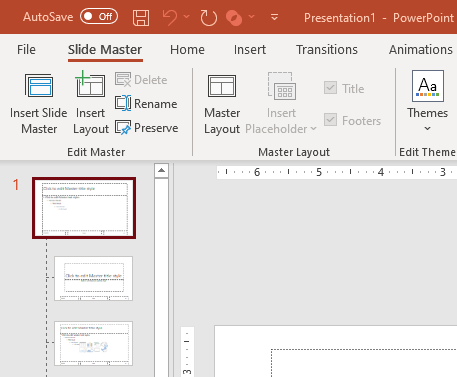
Step 2: Select the Main Master Slide
In the left-hand panel, click on the very top slide in the hierarchy. This is your main Slide Master—any changes you make here will apply to all slide layouts beneath it. Think of it as your presentation’s design foundation.
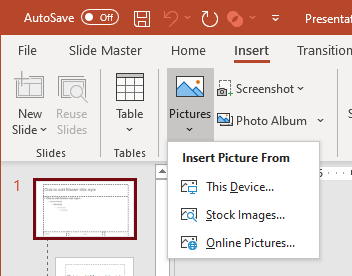
Step 3: Insert Your Logo
Now, it’s time to add your company logo. Click on Insert > Pictures > This Device (or select from your OneDrive or stock images). Choose your logo file and place it where you want it to appear on every slide.
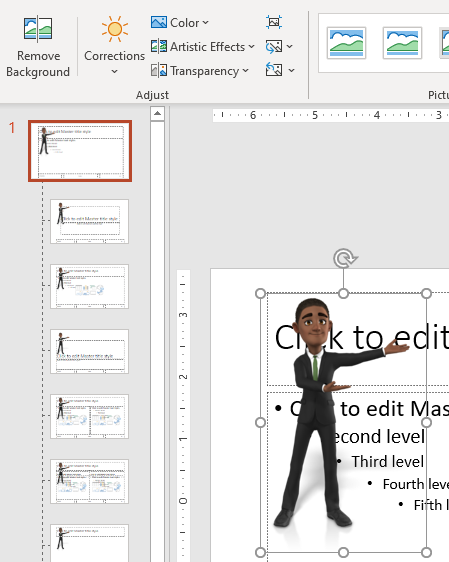
Common placements include the lower-right corner, lower-left, or top bar of your slide. Keep it subtle so it enhances rather than distracts from your main content. You can also adjust transparency slightly if your logo is bright or bold.
Step 4: Apply the Logo to All Slide Layouts
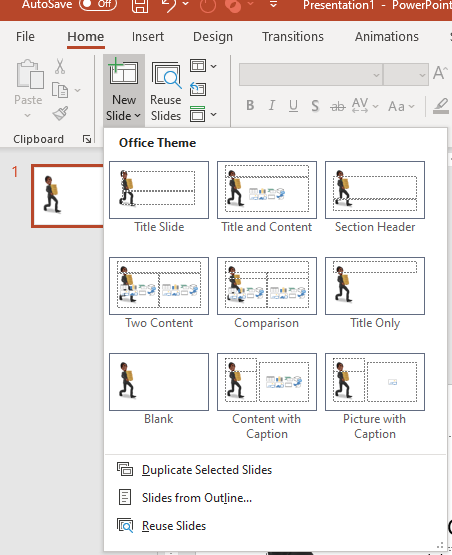
Once your logo is positioned on the main master, you’ll notice it automatically appears on all other layouts below it—title slides, content slides, section headers, and more. This ensures every new slide you add stays branded without additional setup.
If you only want your logo to appear on certain slide types—like title slides or end slides—select that layout specifically in the Slide Master panel and insert the image there instead.
Step 5: Close Master View
When your logo looks right, click the Slide Master tab and choose Close Master View on the far right. You’ll return to your normal editing view, and your logo should now appear consistently across your presentation.
Step 6: Test and Save Your Branded Template
Add a few new slides to confirm your logo appears in the correct position. If it’s too large or too close to content, return to Slide Master and adjust. When you’re satisfied, save your file as a .POTX PowerPoint Template. This makes it reusable for future presentations with your company branding already in place.
Bonus Tip: Align Your Branding with a PowerPoint Template
You can save even more time by starting from a pre-designed template that already matches your company’s look and feel. Explore our PowerPoint templates collection for business themes, clean modern designs, and built-in layout consistency.
Troubleshooting Common Issues
- Logo doesn’t appear on all slides: Make sure you inserted it on the very top Slide Master, not a sublayout.
- Logo overlaps text or graphics: Adjust its position or resize it in the Slide Master to prevent overlap.
- Need to remove logo on specific slides: Right-click that slide and choose “Hide Background Graphics.”
Final Thoughts
Adding your company logo to every PowerPoint slide is one of the easiest ways to maintain a consistent, polished brand identity. By mastering this simple technique, you ensure that every presentation you deliver—whether to clients, colleagues, or partners—reflects your company’s professionalism.
If you want to go further, pair your logo placement with your custom PowerPoint templates from PresenterMedia. These templates are fully editable, visually striking, and perfect for branded business decks.