
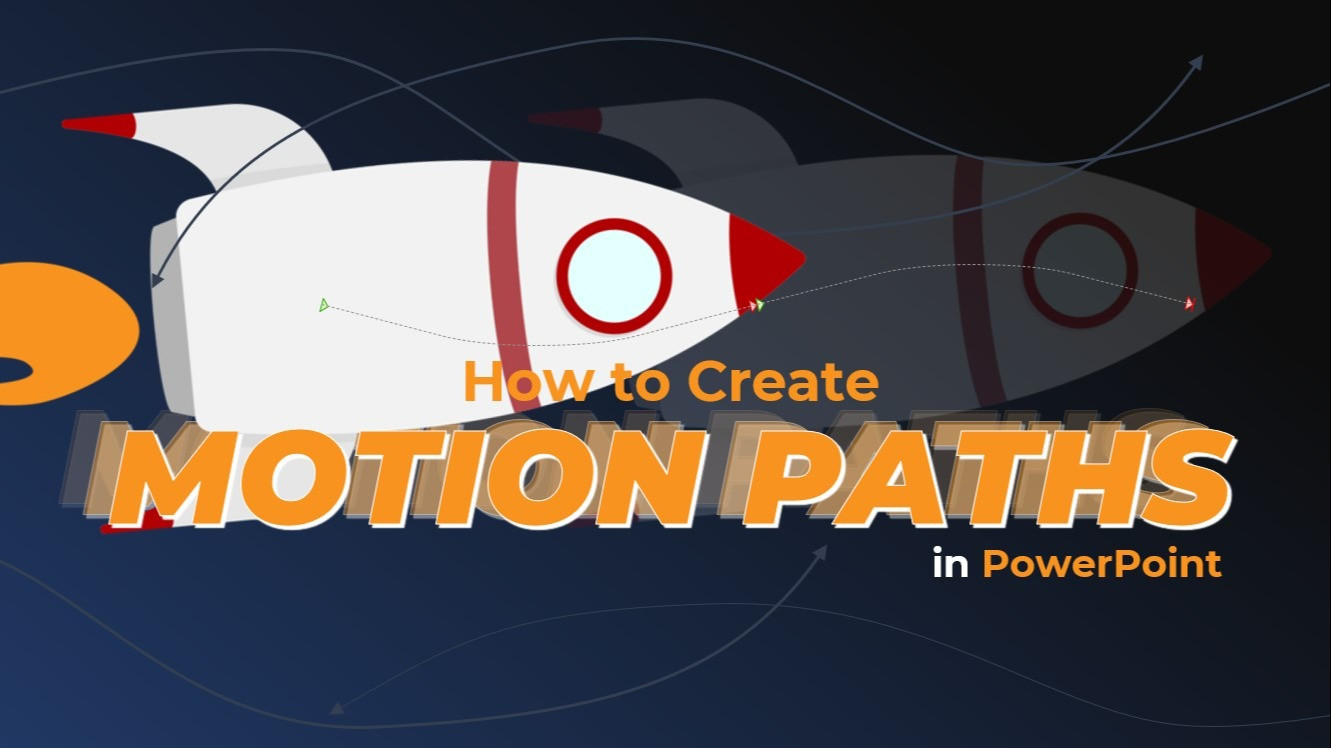
Make Your Slides Alive! A Comprehensive Guide to Motion Paths in PowerPoint
Motion paths in PowerPoint are a great way to add pop to your presentation slides by adding engaging animation in PowerPoint to grab your viewer's attention. Today we will use clipart image elements to show the concept of Motion Paths in PowerPoint.
Although we use images for this tutorial, you can add a motion path to text or a shape.
👉 Looking for designs to practice animation on? Explore our PowerPoint templates with built-in animation-ready layouts.
How to add a motion path to an object
- First, select the object or text box you want to animate with a motion path. You can choose any object, such as an image, shape, or text box.
- Next, go to the Animations tab in the PowerPoint ribbon, and click the Add Animation button.

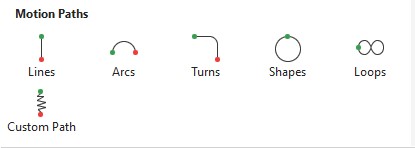
- Choose the motion path animation you want from the options available. There are a variety of motion paths to choose from, including curves, lines, and shapes.
- Once you've selected a motion path, a preview of the animation will appear on the slide. As needed, you can adjust the start time, duration, and other animation settings from the Animations tab.

- To customize the motion path, click on the object you want to animate, then click on the Effect option button next to the Add Animation button.

- If you want to add more motion paths to an object, you can select the object and then click the Add Animation button again. Choose a new motion path and adjust the settings as needed.
- Once you've finished creating your motion path animations, you can preview the entire slide show by clicking the Preview button in the PowerPoint ribbon. If everything looks good, save your presentation and enjoy your animated motion paths!
Edited motion path points to create a custom animation path.
- Select the object that has the motion path animation applied to it.
- Click on the "Animations" tab in the ribbon.

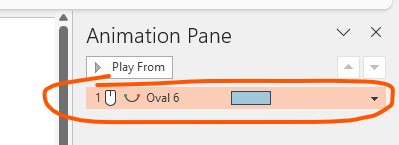
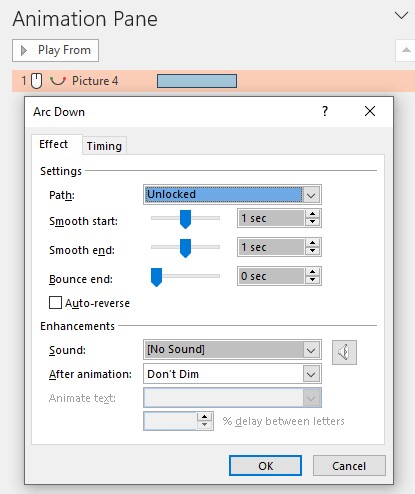
- Click on the "Animation Pane" button to open the Animation Pane.

- Find the motion path animation in the Animation Pane and click on it to select the motion path on your slide.
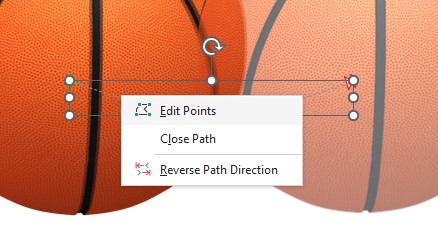
- Put your mouse over one of the small circles on the path selection and right-click. Choose edit points from the options.
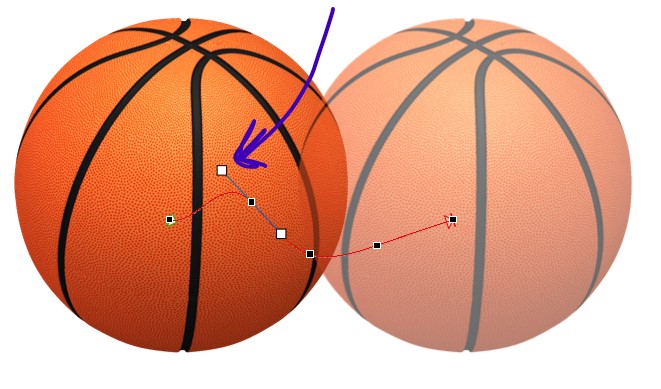
- You should now see points along the motion path. Use the mouse to drag the point to a new position. You can also adjust the path curve by dragging the Bezier handles that appear on the point.
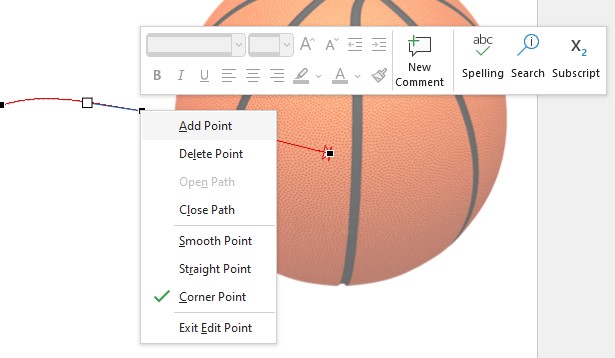
- Right-click on a point for more options to delete or select smoothing, straight, or corner.
You can change the effect option further by double-clicking the motion path in the Animation Pane.
- Preview the animation to see how the new path looks.

Note: If you want to add a new path point, click on the path where you want to add the point. A new point will appear that you can drag to a new position.
Building a Multiple Motion Path Interactive On-click PowerPoint Slide
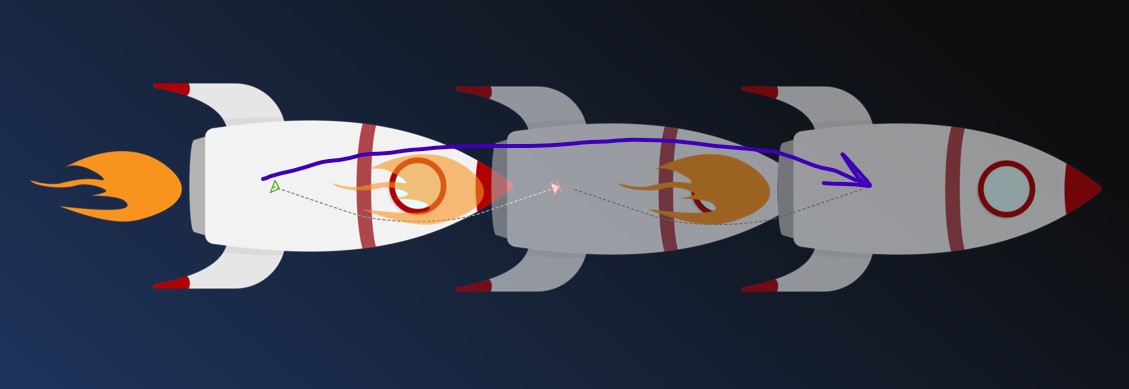
- Add an arc motion path to an object. I'm using a space rocket clipart element from PresenterMedia.
- After adding the first motion path, return back to Add Animation under the Animations menu. Choose another arc motion path to add.
- Open your animation pane and select the second motion path.
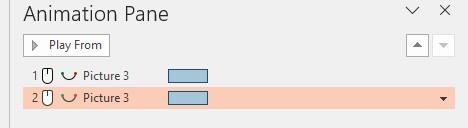
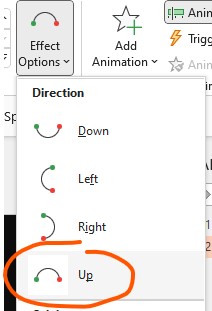
- Select the effect options and change the arc path to Up.
- Now, on your slide, left-click and drag the motion path selection to move it so the start of that motion path is close to the end of the first path. As in the first picture, make sure you click and hold on the path line to move it. Note: it should snap to the end of the first path if you're close enough.

- Preview your slide and left-click to make the motion path advance. Then, click your mouse again, and the animation will advance to the second motion path.

Note: You can add as many motion paths as you choose. You can build interactive timelines or a bullet point list using this technique.
Remember to keep your animations subtle and relevant to your content. Too much animation can be distracting and take away from your message.
A motion path in PowerPoint is a way to animate an object or text to move along a predetermined path on a slide. Using motion paths in your presentation can help engage viewers in several ways:
- Grab Attention: Motion paths can grab the audience's attention and draw their eyes to a specific point on the slide. When an object moves on the slide, it naturally draws the viewer's attention toward it, helping to keep them engaged.
- Create Visual Interest: Motion paths can make your presentation more visually interesting and dynamic by adding movement and flow to your slides. This can help break up the monotony of a static drop and keep the audience engaged.
- Reinforce Key Points: Motion paths can emphasize key points or ideas in your presentation by adding movement to text or graphics relevant to the topic being discussed.
- Provide a Better Understanding: Motion paths can also help illustrate complex processes or concepts more visually and engagingly. By animating objects to move along a specific path, you can demonstrate the flow or sequence of events, making it easier for viewers to understand.
Overall, using motion paths in your PowerPoint presentations can create a more engaging and memorable experience for your audience while reinforcing key points and ideas.
If you want to check out some completed motion paths, many of our PowerPoint Themed Tempates use motion paths. Check out this retro rocket PowerPoint template; the seventh slide contains a timeline using the multiple motion path technique.